Creating an Orthographic Projection
Steps used to create an orthographic projection
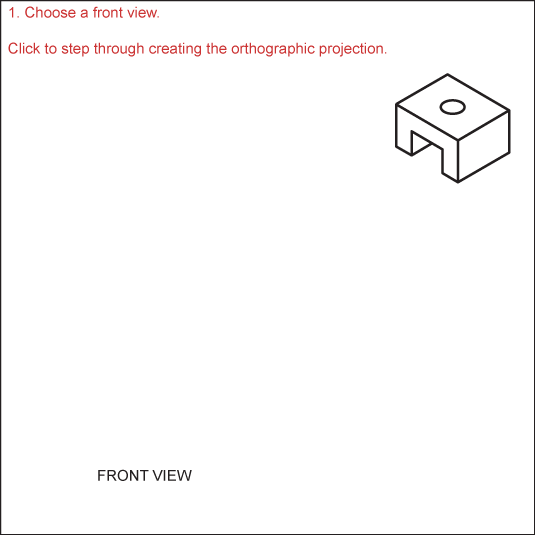
The following steps take you through the creation of an orthographic projection.
- Choose a front view. This is the view that shows the most about the object.
- Decide how many views are needed to completely describe the object. If you are unable to determine which views will be needed, draw the standard views (front, top and right side).
- Draw the visible features of the front view.
- Draw projectors off of the front view horizontally and vertically in order to create the boundaries for the top and right side views.
- Draw the top view. Use the vertical projectors to fill in the visible and hidden features.
- Project from the top view back to the front view. Use the vertical projectors to fill in any missing visible or hidden features in the front view.
- Draw a 45° projector off of the upper right corner of the box that encloses the front view.
- From the top view, draw projectors over to the 45° line and down in order to create the boundaries of the right side view.
- Draw the right side view.
- Project back to the top and front view from the right side view as needed.
- Draw center lines where necessary.
Click on the figure to step through the creation of an orthographic projection.